Inventory or stock control (Tutorial)
We provide an overview of how stock control works in invoiceit!Pro. It explains settings, stock take (count), effect on stock through sales and purchases. In some places, stock is better known as inventory, so on this page the terms can be interchangeable.

Setting up
1) Setup page 4
Next to item #4, select 'Yes' to enable the feature

2) Products Menu
This turns on the stock monitoring for a specific product. If item 1 above is set to "Yes", then 'Monitor' on the product level defaults to Yes when adding a new product. Uncheck if a product does not need monitoring.
3) Stock Count
to start the system you need to enter the starting values for each product (stock count), which includes the quantity held along with unit cost and total value at a given date - shown in red on the picture.
The important rule to remember: All transactions AFTER that date are used to increase/decrease your stock.
Each product can have a different date (rolling stock count). If a product has no value enter $0. If a product is not held, enter the count as 0.
Setup is now complete
Viewing current stock
The Product menu shows you the last stock count, current stock values and you can also set min/max stock levels. These can be viewed as a graphic by clicking on the button left of 'Min'.
Increase stock via Purchasing
to add stock, you must raise a purchase order (but you don't have to send it to your vendor) and receive the P/O. Invoiceit!Pro will suggest order quantities based on your min/max levels.
From Purchasing menu, click 'Receive' button at left, where you can enter the product arrivals from vendors' invoices or packing notes, incl. quantity and purchase cost.
This increases your stock (provided items are received after the last count and are monitored). A new unit cost will be calculated by adding the new arrival to any existing stock of the same item.
To enter products returned to vendors, raise a P/O to them and enter negative quantities, then click Receive button. Your stock will decrease.
The procedures above provide you with a transaction trail. To bypass this, simply make a new stock count.
Decrease stock via Sales (Invoicing)
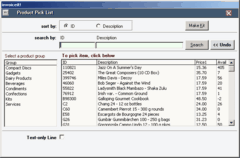
Click on Invoices menu. Sales of products which are being monitored will decrease your inventory, provided items are sold after the last count for selected product. You will see current level of each product in the Pick List ("Avail" column at far right). Credits or returns by customers (negative quantities) will increase your inventory.
Tip: If you credit a product to a customer, but the product is not returned - don't use the product code. Simply type the details in Description field and set a negative quantity. This will credit the appropriate amount to the customer, but does not 'return' the goods to inventory. Using the red CR button will credit all items of an invoice and return to stock those items that are monitored.
Product movement history
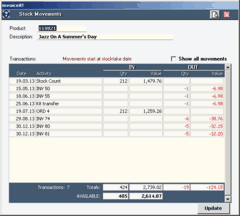
see at a glance where all your stock went and how much arrived. From Products menu, click 'Movements' button at left
Reports
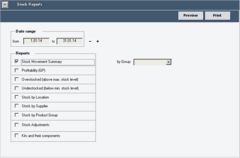
For reports on your inventory | stock, click on Reports menu and select Inventory or Stock option at left.
Stock reports include
• stock movements
• profitability (GP)
• items over/under stocked
• stock by location, vendor and product group
• stock adjustment report
• kits and components


